During the summer it’s hard to ignore that the Sonoran Desert is hot, often exceeding 104 degrees. While seeking refuge from the sun inside, the plants outside are using the energy from the sun to make their own food through a process called photosynthesis. In this activity, instead of using electricity to heat an oven, you can harness the energy of the sun, like a plant, to make your own food. Check out the supplies and directions to make a simple solar oven.
Harvest the Sun with a Solar Oven
During the summer months, it’s hard to ignore hot temps. While you might be seeking refuge from the sun inside, you can harness the energy of the sun to make treats outside. Learn how to use the energy from the sun instead of electricity to heat your oven. Below you will find the supplies and directions to make a simple solar oven.
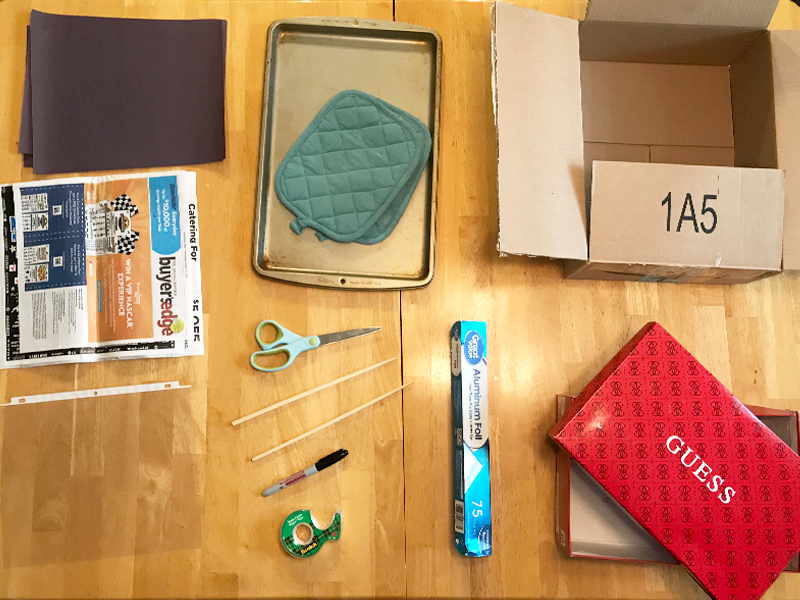
Materials:
- Two cardboard boxes – one smaller than the other so it fits inside with at least a half-an-inch space on each side.
- Larger box needs flaps
- Smaller box needs to have a lid (like a shoe box)
- Black construction paper/cardstock
- A roll of aluminum foil
- Scissors
- Tape
- Marker/Pen
- Two skewers/sticks that you are willing to bend or cut to size
- Clear sheet protector
- Newspaper or other material to stuff between the two boxes
- Cookie sheet
- Hot pads
Directions:
Part 1: Make the inner oven with the smaller box
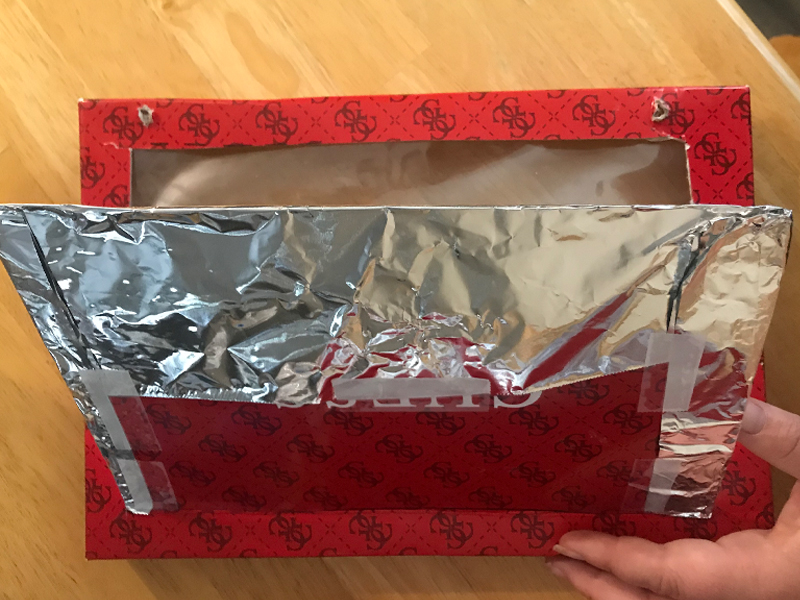
- Trace a square on the top of the lid leaving a 1-2 inch boarder all the way around.
- With the assistance of an adult, cut along the two short sides and one long side making a square flap on the lid. Fold the flap along the uncut edge. This becomes a sunlight reflector flap.
- Tape the clear sheet protector on the underside of the lid to create a window in the lid. You may need to cut the clear sheet protector to fit the lid.
- Line the entire inside and underside of the flap with aluminum foil, using tape to keep in place if needed.
- Line the inside of the box with black construction paper (yes cover up the foil).
- With the assistance of an adult poke two holes in the border of lid just above the two corners of the flap.
Part 2: Prepare the outer box
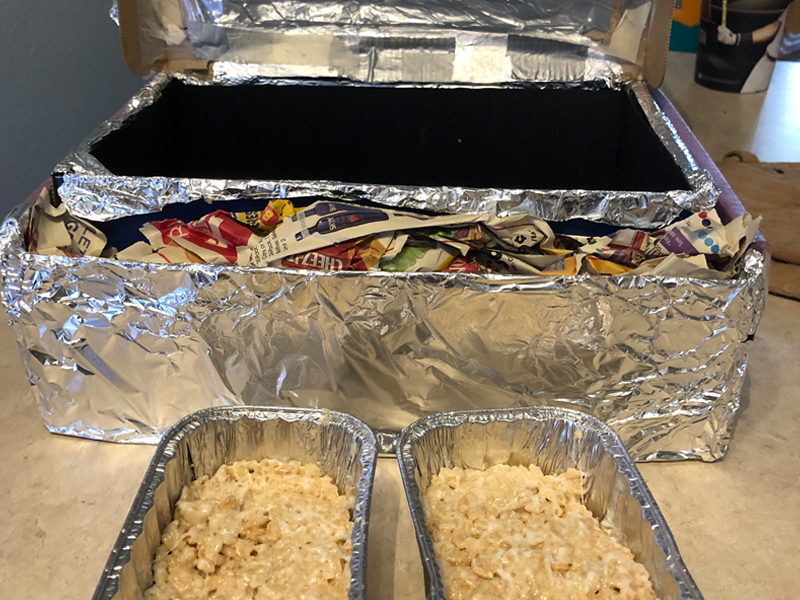
- Cover the four flaps with aluminum foil.
Part 3: Assemble the solar oven
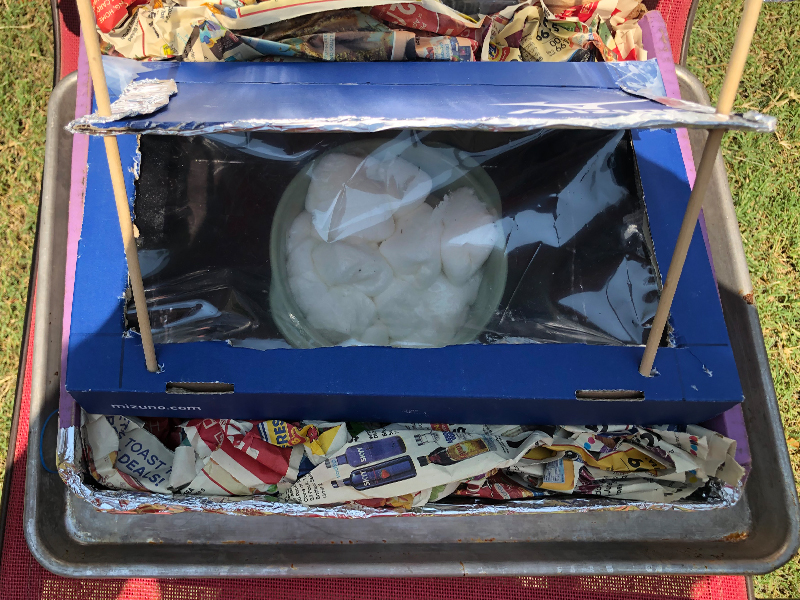
- Place the smaller box inside the larger box.
- Stuff the space in between the two boxes with newspaper for insulation.
- Place skewers through the holes to prop up the reflector flap.
- Tape three sides of the larger box together so that it catches the sun and reflects it back into the oven.
- Place the whole oven on top of a metal cookie sheet.
You are now ready to harvest the power of the sun! The solar oven works best when the temperature outside is over 100 degrees–even better if close to 110 degrees. Position the oven so that the flaps collect and reflect as much sun light as possible down into the oven.
Decide what treats you want to test making in your solar oven. Here are a few ideas:
- Use the oven to make s’mores or s’mores dip
- Melt the ingredients to make Rice Krispy treats
- For a challenge mix up your favorite cookie dough recipe, bake miniature cookies by dropping a small amount of cookie dough on cookie sheet (the smaller the better). It will take a few hours (few hours? cookies take 10 min) for the cookies to bake. You’ll need to make a small cookie sheet by cutting a piece of cardstock that will fit inside the smaller box and cover with tin foil
- Try making fruit leather – prepare ingredients inside, and dehydrate the fruit leather on parchment paper in the solar oven
Caution- the cookie sheet below the oven will be hot. Use caution with a hot pad when handling the solar oven after it’s been in the sun.


